


Lawn Renovation Preparation: How to Set Yourself Up for Success
|
|
Time to read 5 min
|
|
Time to read 5 min
If your lawn is looking tired, uneven, or full of weeds and bare patches, it might be time for a lawn renovation. Lawn renovation is the process of rejuvenating your turf to bring it back to full health and improve its appearance. But before you reach for the scarifier or start topdressing, proper preparation is critical. The more time you spend getting ready, the better your lawn renovation results will be.
In this guide, we’ll walk you through everything you need to know to prepare your lawn for a successful renovation.
Lawn renovation isn’t just about making your grass look better (although it definitely helps with that). It also helps to:
Remove thatch build-up that blocks water and nutrients
Reduce compaction and improve soil structure
Fix patchy or uneven areas
Remove weeds and undesirable grass species
Promote strong, even, and healthy regrowth
Renovation is ideal heading into spring or early autumn, depending on your grass type and location. A proper lawn renovation sets the stage for long-term lawn health.
Before diving into any renovation, take stock of your current lawn condition:
Thatch level : Grab a small core sample. More than 1cm of thatch? It’s time to dethatch.
Weed pressure : Is your lawn full of broadleaf weeds or winter grass?
Compaction : Is water pooling or are the roots shallow?
Coverage : Are there bare patches or thin areas?
Once you know what you’re dealing with, you can tailor your lawn renovation prep to suit. Understanding these key areas will ensure you carry out the right renovation methods for your specific lawn.
There’s no point renovating over weeds. Tackle them ahead of time:
Use a selective herbicide like Bow and Arrow for broadleaf weeds.
For winter grass, use a targeted herbicide like Odessa .
Allow 7–10 days post-herbicide before starting renovation work.
Proper weed control ensures your lawn renovation doesn’t get undermined by aggressive invaders.
A few days before or the day of, mow your lawn down nice and low. This will:
Remove excess leaf material
Make dethatching and aerating more effective
Allow sunlight to reach new shoots after renovation
Be careful not to take off too much in one mow. Gradually reduce the height over 2–3 sessions to avoid shocking your lawn. This approach will make your lawn renovation more successful.
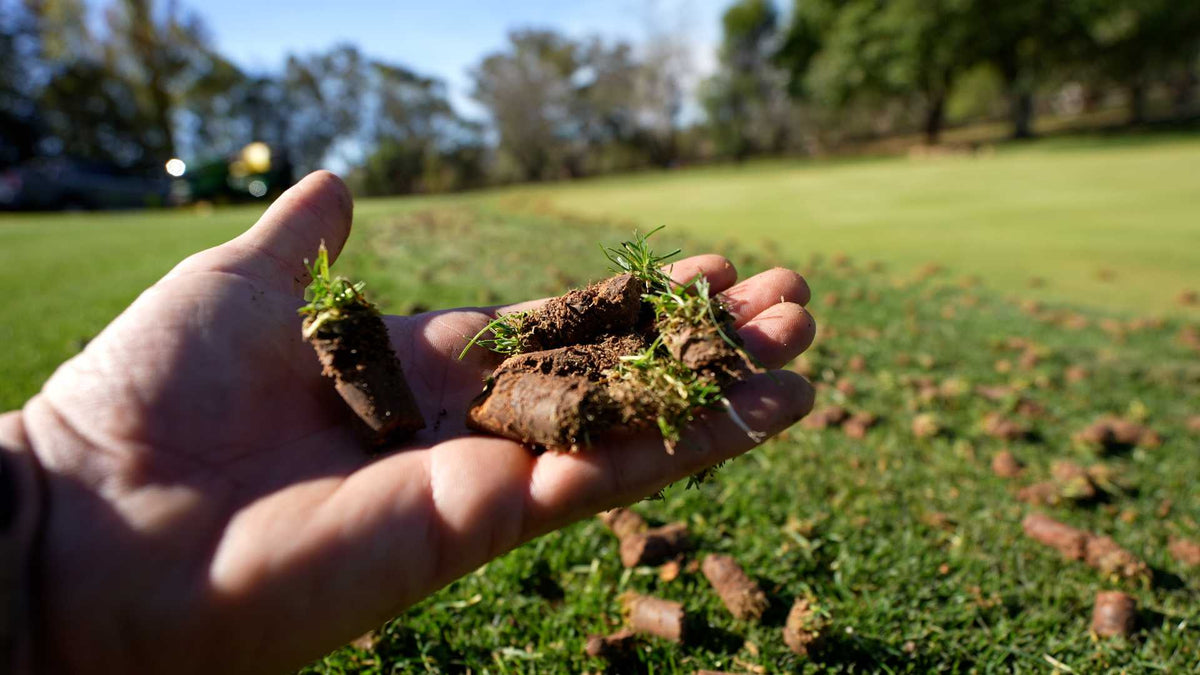
Thatch is a layer of dead grass and roots that builds up between the soil and the green part of your lawn. If it’s too thick, it prevents air, water, and nutrients from getting where they’re needed.
Use a scarifier or dethatching machine to remove thatch.
Collect and remove debris so it doesn’t smother your lawn.
You can hire a machine or use a powered dethatcher like the Ryobi.
Dethatching is one of the most critical lawn renovation tasks.
Compacted soil restricts root growth. Aeration opens up your soil, improving drainage and oxygen flow:
Use a core aerator or garden fork to punch holes throughout the lawn.
Focus on high-traffic and compacted areas.
Aeration is especially important for clay-based soils.
A well-aerated lawn will respond much better during the renovation process.
Topdressing helps level uneven areas, improves soil quality, and protects emerging shoots:
Use washed river sand or a sand-soil blend depending on your goal.
Spread with a lawn level tool like our 40-Inch Lawn Level.
Apply evenly, aiming for 5–10mm coverage.
Avoid burying the crown of the grass – you want the leaf tips poking through.
This renovation step gives your lawn the best base for regrowth.
For cool-season lawns or large bare areas, you might want to:
Overseed with ryegrass or fescue
Sprig couch or kikuyu by spreading fresh scarifying clippings and topdressing
Make sure to keep moisture up after sowing or sprigging for the first 2–3 weeks. Overseeding can dramatically enhance your lawn renovation results.
Start with Dominate Fertiliser immediately after renovation to kickstart root recovery and growth.
After about two weeks, follow up with Pure Balance , Pure Seaweed+ , and Pure Iron+ to boost strength, resilience, and colour.
Apply Pure Wetter to help water soak evenly into the soil and improve penetration.
A good fertiliser program post-renovation is vital for recovery and growth.
A: Spring and early autumn are the best times, depending on your lawn type and local climate. Warm-season grasses prefer spring, while cool-season lawns can be done in autumn.
A: If your lawn has excessive thatch, weeds, bare patches, compaction, or uneven growth, it’s a good candidate for renovation.
A: Dethatching is highly recommended if there's more than 1cm of thatch. Skipping it may reduce the effectiveness of other renovation steps.
A: Wait until new growth reaches mowing height—typically 2–3 weeks post-renovation. Avoid scalping too soon to protect new shoots.
A: Yes, fertilising supports recovery. Start with a granular product like Dominate, then switch to liquid options like Pure Balance or Pure Iron+ after two weeks.
A: Limit foot traffic for at least 2–3 weeks after renovation. This allows roots and shoots to establish without damage.
Start by controlling weeds early
Scalp, dethatch, and aerate for best results
Level with topdressing sand and consider overseeding or sprigging bare areas
Start with Dominate, then switch to liquid fertilisers for recovery
Use wetting agents to improve water penetration
Keep up regular watering and mowing once growth returns
Follow these renovation steps closely for the best lawn transformation
Water regularly for the first few weeks to help the lawn recover
Avoid traffic on freshly renovated lawns
Stay patient – it can take 3–6 weeks sometimes longer to fully bounce back depending on the season
Your efforts in renovation will be rewarded with a healthier, more vibrant lawn.
Lawn renovation may seem like a lot of work, but it’s one of the best ways to completely transform your yard. With the right preparation, the proper timing, and a step-by-step approach, you’ll set your lawn up for long-term success. Whether your goal is a thicker lawn, fewer weeds, or just a more even finish, renovation gives you a clean slate to work with. Stick with the plan, and you’ll be enjoying a lush, green lawn in no time.
The Author: Ben Sims
Ben Sims is a passionate greenkeeper turned lawn care expert. With years of experience in greenkeeping, he's shifted his focus to helping homeowners achieve their dream lawns. Through his website and YouTube Channel, Lawn Tips, he shares practical advice, comprehensive lawn care plans, and high-quality lawn products to make lawn maintenance more straightforward and effective.
Products Featured In This Blog


